Build an app with AppForge
A simple step-by-step guide from signup to AI build workflow.
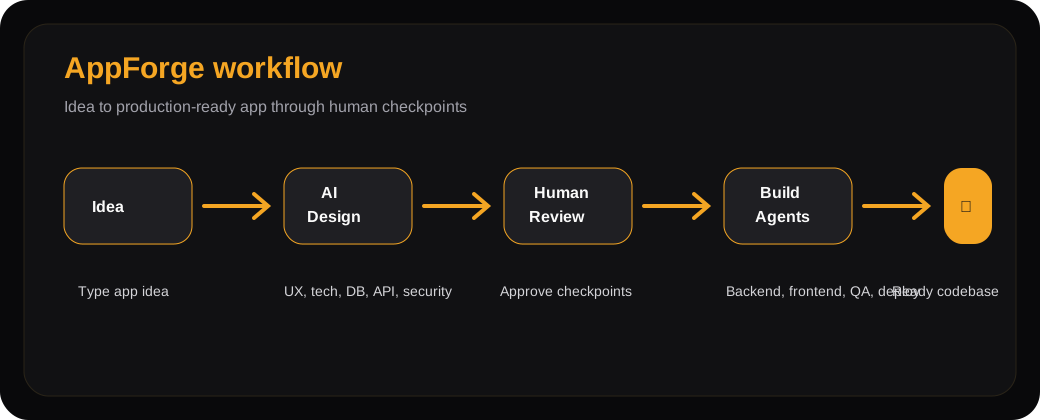
Overview
Type an idea, let AI specialists design and build it, then approve checkpoints until you have a deploy-ready app.
Good idea template
I want to build [app type] for [users]. It solves [problem]. Users need to [main workflow]. Key features are [features]. Special requirements are [mobile/payment/privacy/admin/deploy].
Why AppForge reviews design first
Fast builders can create a draft quickly, but the expensive part is rebuilding after the first design decision is wrong. AppForge puts the blueprint, model comparison, style tokens, app shell, kits, and cost estimate before implementation.
- Revise prompt and scope before design
- Inspect 6 AI outputs and rerun failed labs only
- Lock style tokens, app shell, and kits before code generation
Choose the website style first
Pick one of 10 website directions before the Design Council starts. AppForge injects it into the brief so AI aligns layout, mood, style tokens, copy tone, and content hierarchy from the first pass.
Try Web Style SelectorMinimal Website
Clean, premium, easy to read
Premium brand / Freelancer / Consultant
Corporate Website
Professional company presence
Company / Organization / B2B business
Landing Page
One-page conversion flow
Online course / Workshop / Campaign
E-commerce Website
Products, cart, checkout
Online store / Product brand / Retail
Portfolio Website
Show work, skill, and credibility
Designer / Photographer / Developer
Blog / Content Website
Knowledge, search, SEO
Blogger / Media / SEO business
Personal Brand Website
Profile, expertise, contact
Speaker / Coach / Influencer
SaaS / Startup Website
Features, pricing, free trial
Startup / App / AI tool / software
Community / Membership Website
Members, learning, participation
Community / Online school / Creator
Creative / Interactive Website
Bold, playful, memorable
Agency / Fashion brand / Artist / event
Latest workflow upgrades
The guide now covers the newer planning, recovery, cost, mobile, co-worker, connector, and admin tools: Web Style Selector, editable source prompt, Context Output Studio, Google Workspace import, Prompt Queue Wave 3, Skills Studio, credits, BYOK/model routes, Showcase/Remix, mobile target, timing summary, per-AI design detail, and failed-lab rerun.
- Choose Web Style and build target before the Design Council starts
- Prompt and requirement remain visible in workflow history
- Prompt Queue now supports impact preview, checkpoints, batch apply/revert, and opt-in auto-drain
- Upload files or import Google Docs, Sheets, and Slides as project context
- Context Output Studio creates requirement briefs, guides, demo scripts, and QA checklists
- Skills Studio imports/exports SKILL.md and muai standard policies
- Credits cover build and billable AI actions with clear top-up gates
- Admins can grant credits, reset passwords, manage plans, and route provider/model choices
- Generated apps can target Web, Mobile, or Both and include SEO/AEO readiness
Build it, preview it, then just talk to it
Your app isn't a one-shot export. Run it live, change anything by chatting, and it remembers how you like to build.
Live preview
Spin up a running instance of your generated app in seconds and click around — frontend + backend, on a real URL.
AI Polish — just chat to change it
Your app is built — type what to change ("make the hero bigger, buttons green") and watch it update live. A safety net auto-reverts anything that breaks the build, and you can undo any change.
Click-to-edit
Click any element right on the preview, then tell AppForge what to change — it edits exactly that part.
Build memory — your next app is smarter
AppForge remembers your stack, domains, and the features you've built, so your next app starts informed — you re-explain less. View, edit, or clear it anytime under Account.
Generate images
Need a hero image or icon? Generate it from a text prompt right inside your project.
Pick a design style
Before building, choose from 73 brand-inspired design templates (or a curated style) on the review page — preview the color palette and apply it so your app looks polished from the very first build.
Publish to a live URL
When your app is ready, publish it in one click to a permanent public URL — no expiry, always on — to share with real users.
Share & collaborate
Invite teammates as editor (run + edit) or viewer (read-only) — your app, your team.
The dials you control
AppForge doesn't hide the dials. Cost, model routing, build target, sharing, accounts, and the app shell are settings — some per project, some platform-wide for admins.
Credits and cost gates
Design preview stays free, while build, AI edit, image, audio, and video actions can deduct prepaid credits with a clear top-up path when the balance is short.
Provider and model choice
Admins route each stage to the right provider/model, while users with BYOK can bring their own AI, GitHub, Stripe, Cloudflare, or SSO keys where enabled.
Web, Mobile, or Both
The build target can emit a web app, an Expo mobile companion, or both, with screen mapping and mobile files generated under the same project.
Showcase, remix, and integrations
Finished apps can opt into a public showcase, allow remixing into a new project, and use the public integrations catalog to find which kits fit the next build.
Account and admin controls
Users can reset or change passwords, and admins can manage active/verified/admin/BYOK access, reset passwords, delete accounts, and audit sensitive actions.
Shells, kits, and skills
App Shell Studio, muai-kits, SKILL.md, and standard policies make generated apps repeatable: shell can change while inner content and feature contracts stay intact.
What makes AppForge different
Most generators forget everything between builds. AppForge compounds: it reviews before it builds, spends tokens efficiently, remembers per user, and learns from every failure across the whole platform.
6-AI Design Council
Six AI labs design your app independently and a synthesizer merges the best of all six. Why it helps: a stronger blueprint up front means far fewer expensive rebuilds later.
Context Engine — efficient tokens
Build context is token-budgeted and prioritized; an oversized requirement doc is summarized (not chopped) before the prompt. Why it helps: builds are cheaper and predictable, with nothing important lost.
Cross-app memory
A compact, per-user memory distilled from your finished apps is injected into your next design. Why it helps: returning users re-explain less and designs start already aligned to how they build.
Self-improving (Generation Lessons)
Every build failure or reverted edit is distilled into a generalizable rule; an admin approves the good ones, which then inform every future build — platform-wide. Why it helps: quality compounds the more apps everyone builds (a moat that can't be copied, only accumulated).
Safe instant preview
Previews run AI-authored code in an isolated sandbox (host process, hardened Docker, or a Firecracker microVM) chosen by policy, with a public URL via a reverse proxy. Why it helps: you try real apps live without putting the platform at risk.
Production-grade ops & security
A real AI-spend ceiling, structured logging + error reporting, automated source-and-data backups, and a security pass (signed webhooks fail-closed, authenticated streams, token revocation, strict tenant isolation). Why it helps: it's safe to take real, paying users.
Reusable features you can start from
Browse the kit catalog by category. Click a kit to see what it adds, dependencies, use cases, and a visual example.
Catalog syncs from muai-kits and falls back to the bundled starter kit.
Click any feature
Loading kit catalog...
Core / Infra
AI / Engagement
Cross-cutting
Utilities
Sensors / Vision / Biometric
Multimedia
Preview every UX/UI style
world-class brand looks you can apply in one click on the review step — preview them all here so you know exactly how your app will feel before you build.
Watch the Plan First demo
A 35-second clip that shows how to think through the first button: idea, planning questions, requirement scope, Design Council detail, and final blueprint approval.
E2E creation demo
The full AppForge flow: idea, Plan First, kits, 6-AI design, blueprint approval, build, preview, and handoff.
Marketing highlights
A punchier overview for marketing: Plan First, 6-AI Design Council, muai-kits, managed AI context, cost control, and production readiness.
Watch the Plan First demo
A 35-second clip that shows how to think through the first button: idea, planning questions, requirement scope, Design Council detail, and final blueprint approval.
Real example: OT workflow
A concrete OvertimeFlow walkthrough with sample OT requests, scope choices, per-AI council outputs, screens, data tables, APIs, kits, and approval decision.
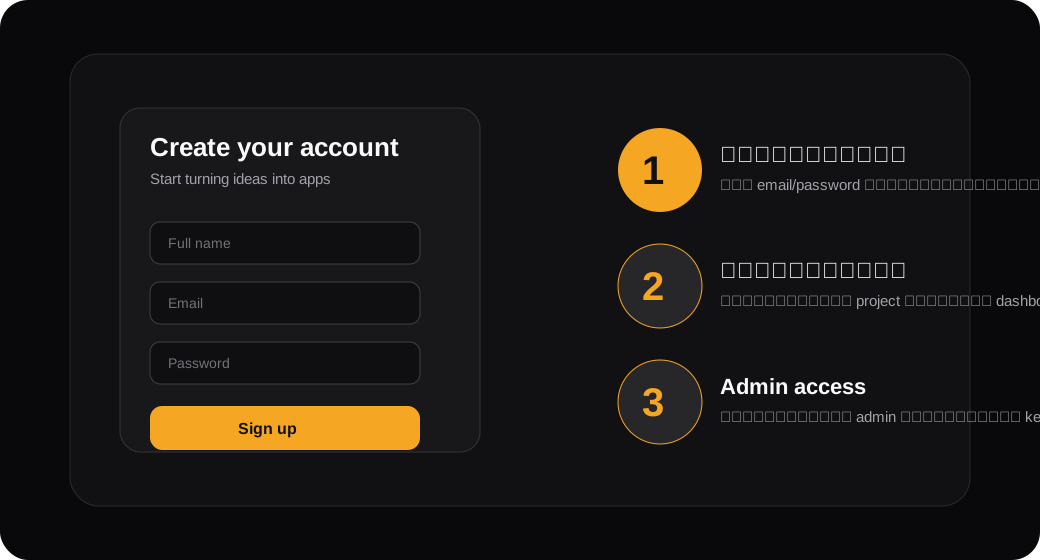
1. Sign up or log in
Create an account so AppForge can save your projects and return you to the right workflow.
- Use Sign up for a new account
- Use Log in if you already have one
- Admin pages require an admin account
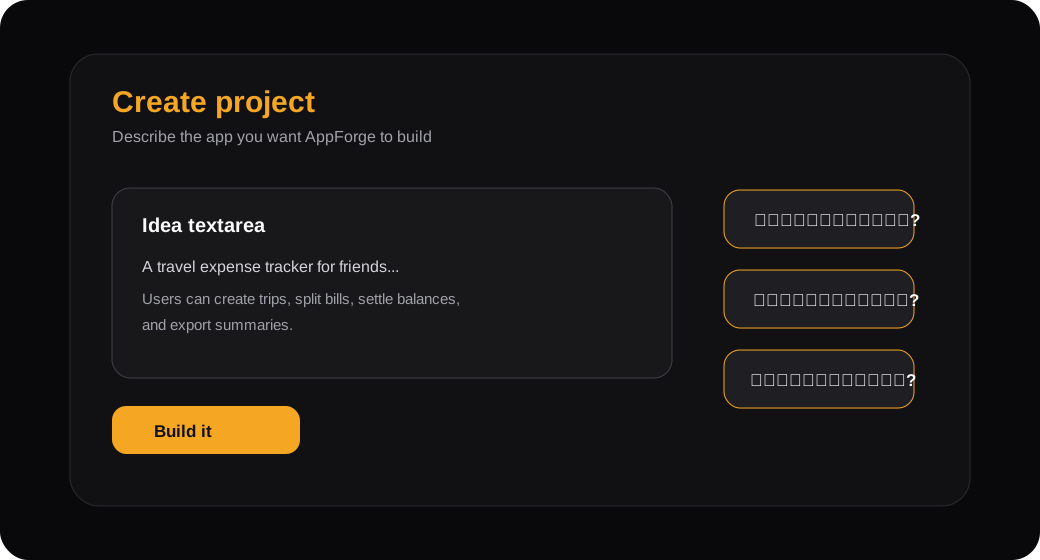
2. Describe your app idea
Tell AppForge who the app is for, what problem it solves, and the core features you expect.
- Name the target users
- Describe the main workflow
- Add special needs such as mobile, payment, admin, privacy, SSO, or integrations
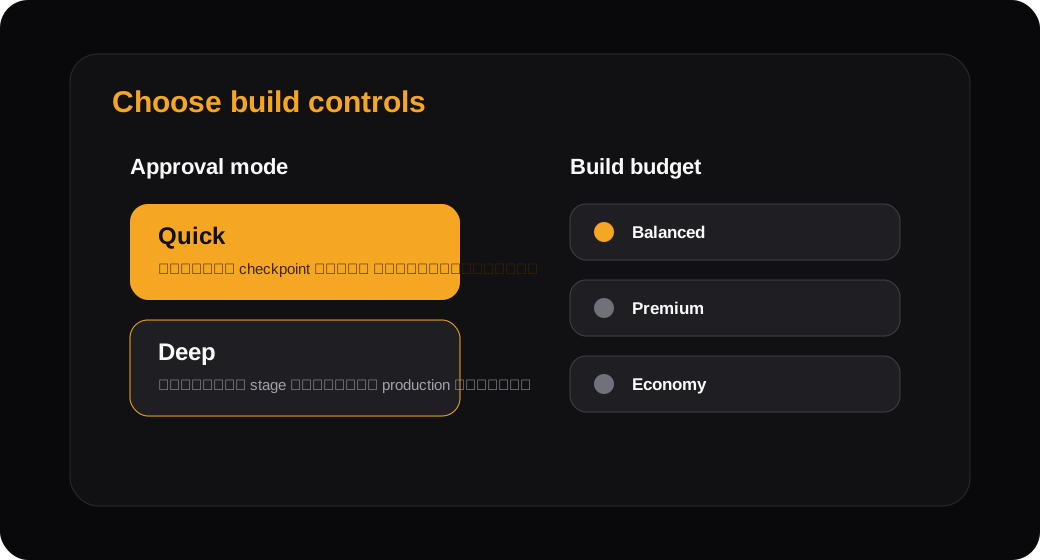
3. Choose style, platform, mode, and budget
Pick the website direction, target platform, approval depth, and AI budget before implementation starts.
- Choose one of 10 Web Style directions or a design template
- Set the build target: Web, Mobile, or Both
- Budget controls the implementation model mix and credit estimate
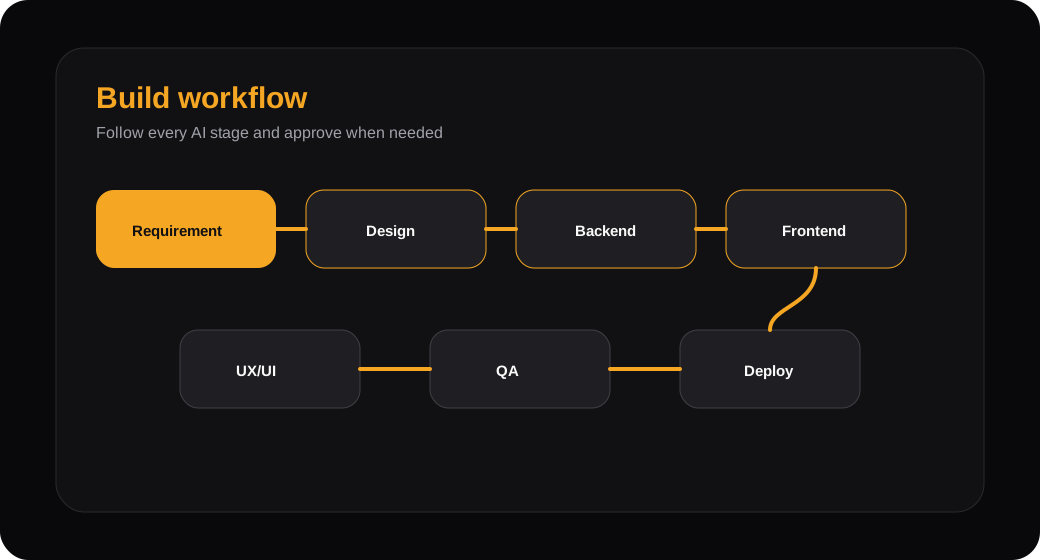
4. Follow the workflow
Watch AppForge move through requirement, design, backend, frontend, UX, QA, and deploy stages with estimated and actual time.
- Each stage shows live status, estimated time, actual time, and saved content
- Failed stages can be inspected and rerun
- Prompt Queue follow-ups can be queued before the next gate

5. Review prompt, requirement, and scope
After the Requirement stage, AppForge shows the original prompt, expanded requirement, and a checklist you can trim before design starts.
- Edit the first prompt if the idea was too short or unclear
- Uncheck features that are not needed for the first version
- Saving scope reruns downstream stages with cleaner context
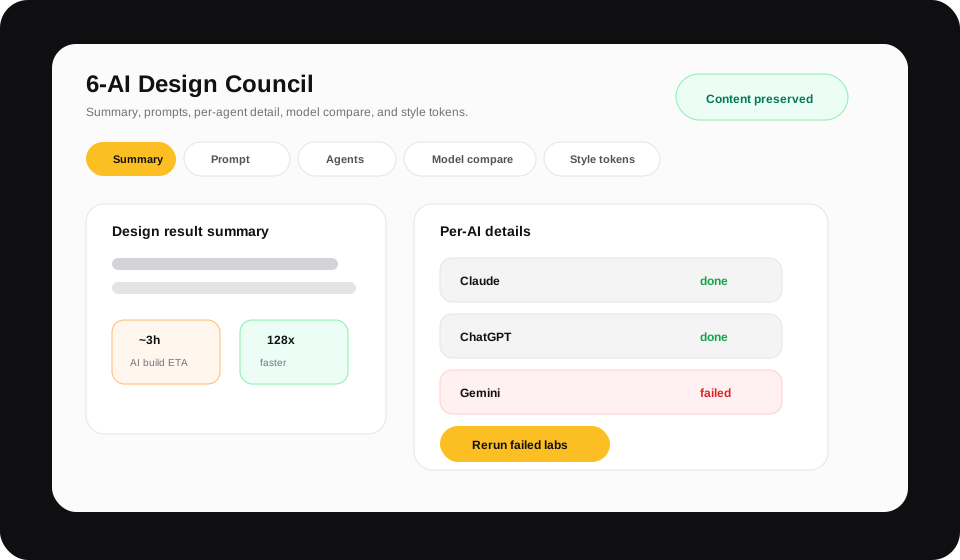
6. Inspect the 6-AI Design Council
The design page keeps the summary, original prompts, per-AI outputs, model comparison, and style tokens in separate tabs.
- Open each AI tab to inspect its prompt and raw result
- Rerun only failed labs without paying the cost of completed labs again
- Use the AppForge vs manual comparison to see speed and cost value
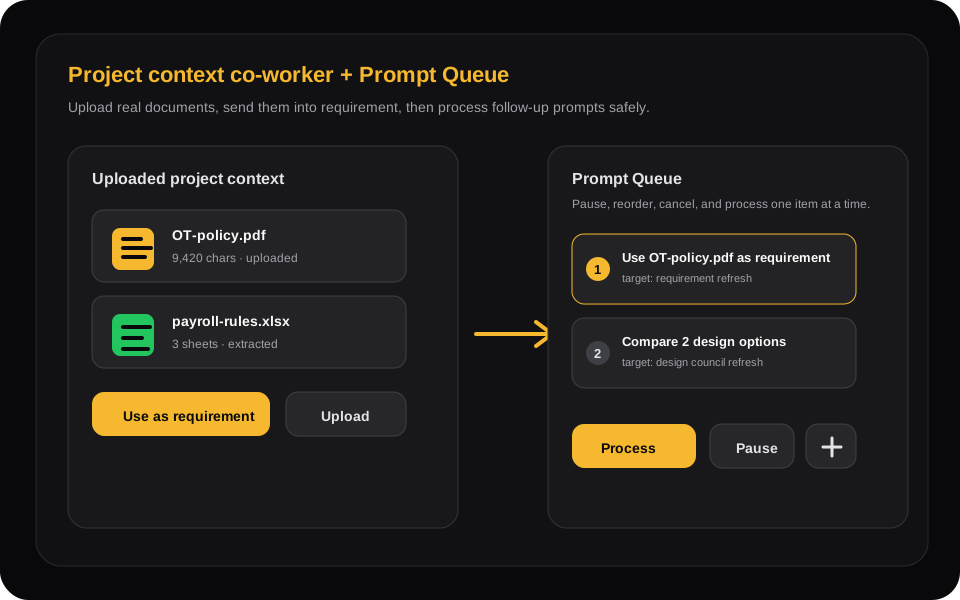
7. Add context and follow-up prompts
Upload files or import Google Docs, Sheets, and Slides into Context Output Studio, then turn them into requirement briefs, guides, demo scripts, QA checklists, and queued follow-up prompts before implementation begins.
- Supported uploads include PDF, DOCX, CSV, XLSX, PPTX, HTML, Markdown, and TXT
- Google Workspace import uses read-only Drive access and imports only the files you choose
- Prompt Queue supports edit, reorder, cancel, impact preview, checkpoint, batch apply/revert, and opt-in auto-drain
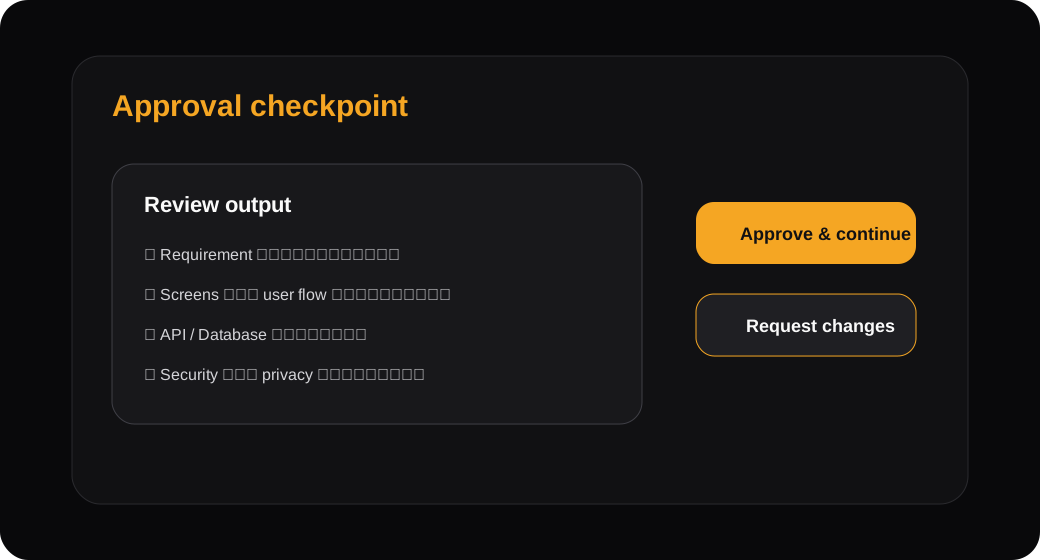
8. Approve checkpoints
When the workflow pauses, review the output before letting AppForge continue.
- Check requirements, screens, API, database, and risks
- Approve if correct
- Rerun failed stages or revise upstream prompt before approval if something is off
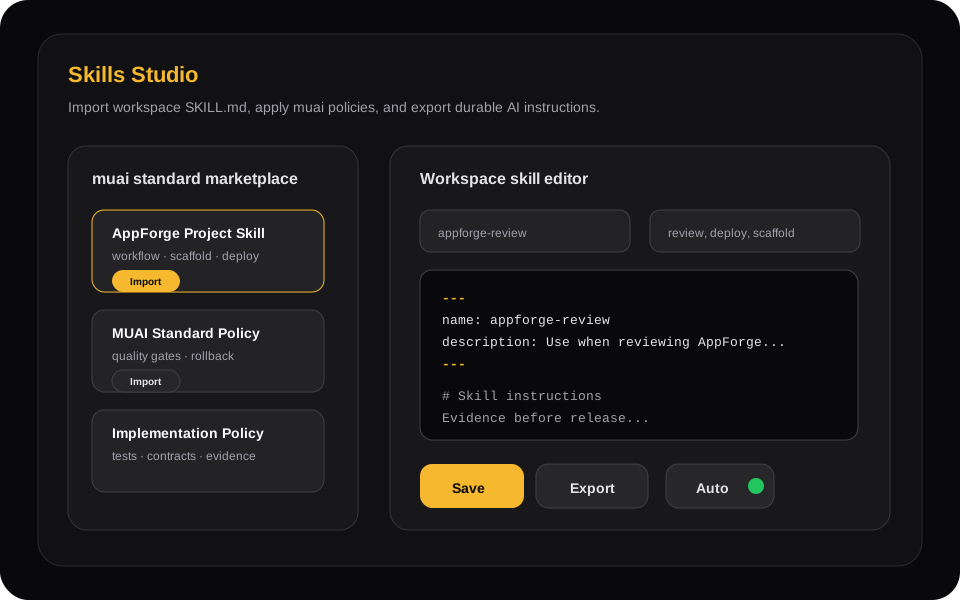
9. Manage Skills Studio
Admins can import workspace or project SKILL.md instructions so AI work follows your standards automatically.
- Import muai standard and policy skills from the marketplace
- Export any skill back to SKILL.md
- Use task triggers and auto-apply to match skills to design, review, deploy, or debug work
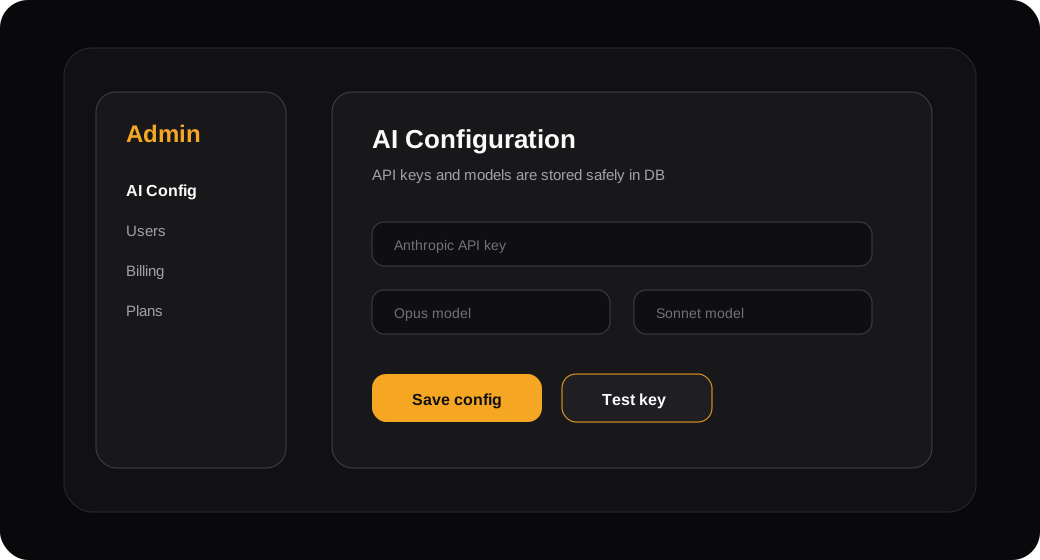
10. Admin setup
Admins can configure provider keys, model routes, billing credits, users, plans, GitHub, Cloudflare, SSO, landing sound, quality dashboards, and generated-app SEO/AEO readiness.
- Go to Admin settings for provider/model routes and Test key
- Use Admin Users to reset passwords, toggle BYOK/admin access, and grant manual credits
- Use Plans, Billing Ops, Audit, Quality, Reliability, and Growth pages to run the platform
Common issues
Failed to fetch
Check that the backend or production stack is running.
Dev backend does not open
Use http://localhost:8002, /docs for Swagger, and /health for health checks.
New dev page loads but API fails
Run backend migrations with alembic upgrade head, then refresh the page.
Admin denied
Your user must have admin permission.
AI does not respond
Check API keys in Admin settings and run Test key.
Model not found
Pick a model supported by the selected provider, or route that stage through OpenRouter.
Not enough credits
Open Credits, top up, then return to the same workflow.
Checklist cannot be edited
Scope can be edited before build starts. After implementation begins, create a revised prompt or new workflow.
Prompt Queue waits
Approve the current gate or enable auto-drain only when the queued changes are safe to apply.
Old icon or page
Hard refresh or open an incognito window.